(19 low res pics loading)
FEB 14 2005
Intro:: Shawn was looking to have some good 529 gears installed but did not have a lot of extra money so we consulted and it was decided to re-use the old bearings as long as they were still servicable. We could also get away with a simple crush sleeve in the front. I already know that Shawn is very hard on his equipment so I decided to use US GEAR 529's. The rear install would get the solid collar treatment.
We did the front first. Started by marking the caps.....
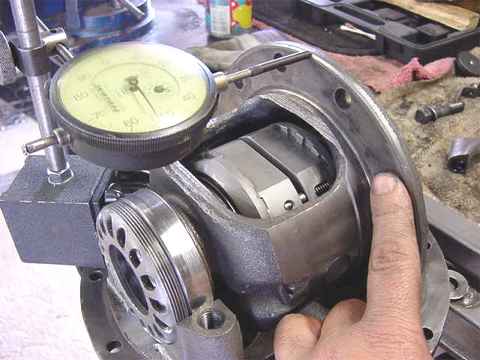
Just using the dial indicator to check run-out. I had less than .002".
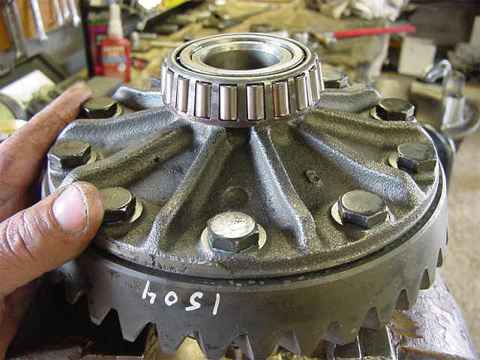
The ring gear bolts were loaded with blue Loctite and 70 ft/lb. The carrier bearing on the ring gear side was a loose fit but sleeve lock compound took care of that.

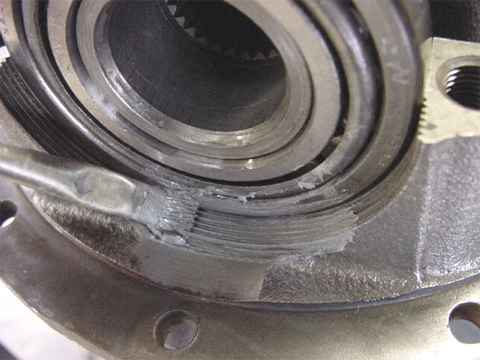
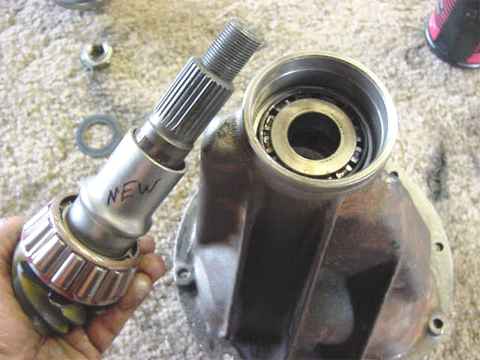
The old pinion bearings passed inspection and will be re-used.
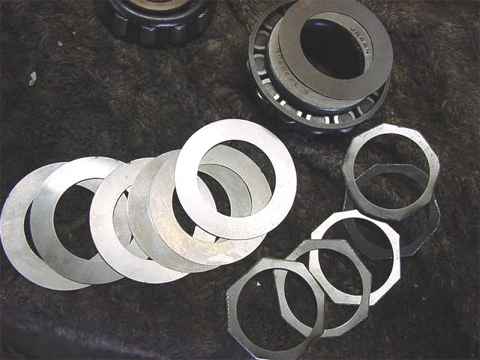
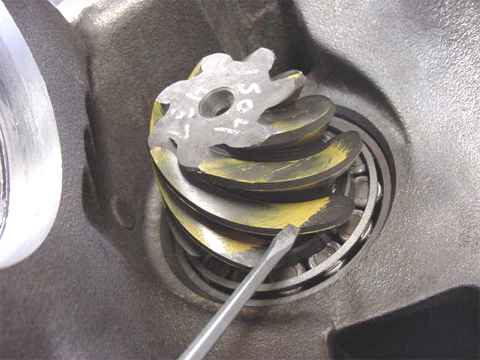
Those wide shims on the left leave no room for fingers to grip if/when the pinion bearing has to be re-moved for a re-shim....the solution is to trim them down like the ones on the right. I used a pair of pliers and a thin cutting wheel to trim off the edges.
A crush sleeve will be used as the last process so for now it's assemble with no crush at all and snug the nut down til about 4 in/lb of drag is measured.
I like to use anti-seize on the bearing adjuster threads. Easier to overcome all that thread resistance when doing the final 90 ft/lb carrier bearing pre-load.
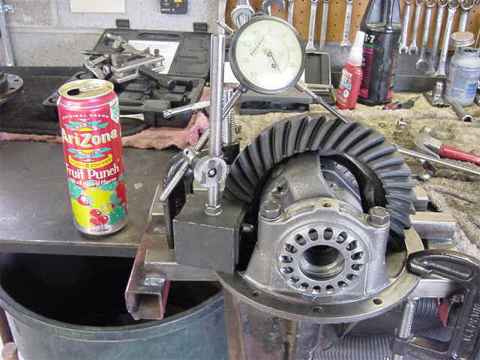
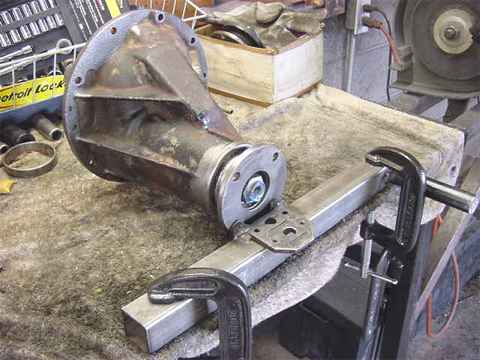
The backlash is about .010" here and the carrier bearings are very tight. To get a readable pattern, I wedge a crowbar against the ring gear and loose carrier bearings would cause false readings so tight counts. My support stand for the 3rd member is crude but will "evolve" with time.
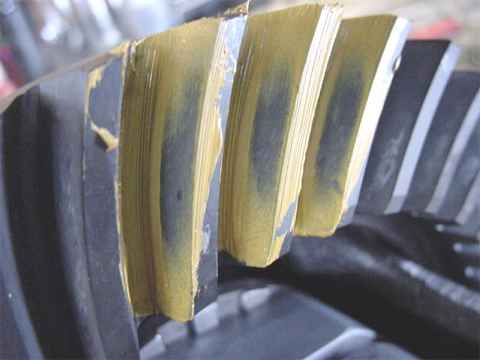
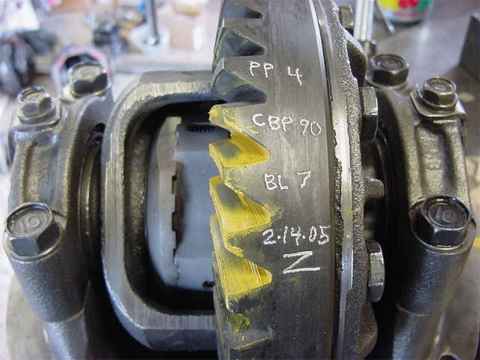
If the pinion bearings were new, I probably would use 97~100 thou for the pinion shim.....but used bearings change that. I chose .105" and this is a good pattern 1st time.
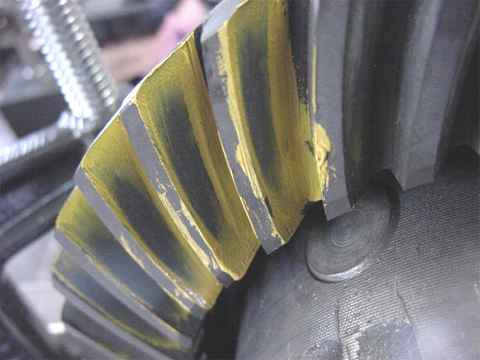
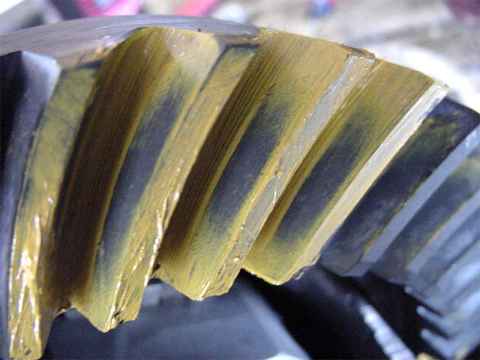
coast side .105"
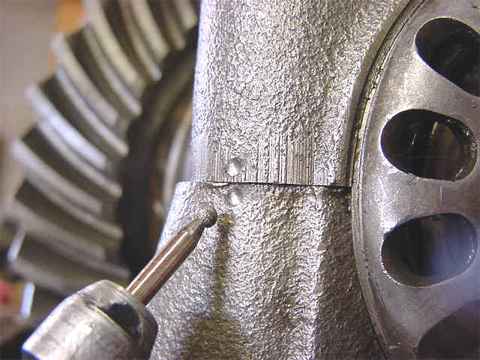
This is the reason why pinion teeth generally don't break first(in a proper gear install)....this is where the tooth on the ring itself ends. It's still about 1/4" from the heel end....it's the heel end that sees all the load during hi-horsepower applications.
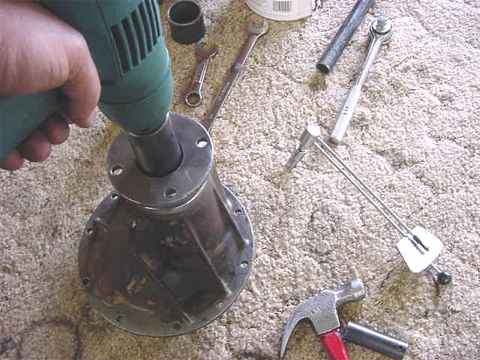
Load the new crush sleeve up.....

The blue RTV helps the new seal tap on nicely. A hammer can ruin a seal. Don't forget to apply some grease/gear-oil to the rubber seal surfaces.
A very simple tool for locking the yoke in place. Blue Locktite is on the re-used nut.
I mentioned it on one of the internet 4x4 boards that I could crush a sleeve with 2 fingers so I did...and continued crushing it with 2 fingers til the spec was reached. Just wanted to show that it's not that hard to crush those things. The blue Loctite sort of acted like a thread lubricant anyways.
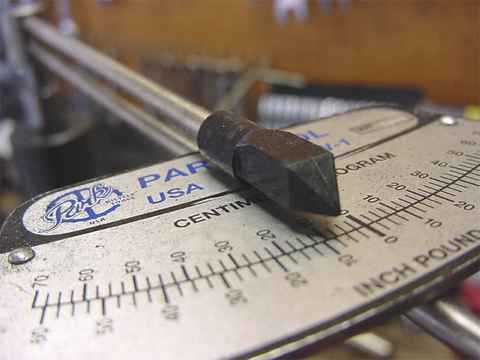
These are used bearings so I did not want to see more than 6 in/lb of pinion pre-load.
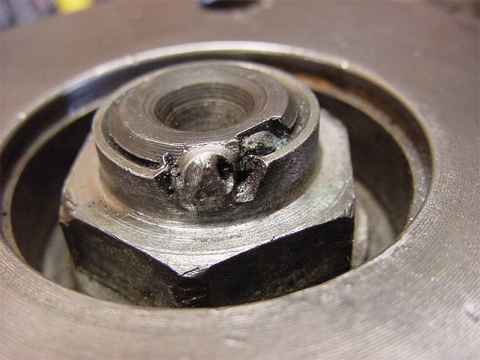
I couldn't resist....Even though there is Loctite on it, I had to spot MIG it. :)
With it all buttoned up, I made one more drive pattern check with the .007" backlash....looks great.
Talk about documentation. :)